Project: Molding and Casting of a Crater on Mars
Machine(s): Roland Modela Mill | Material(s): Wax, Silicon, DryStone
Back to Main Page
Official Assignment Description: 'design a 3D mold, machine it, and cast parts in it'
This week's assignment required us to go through a three-part process to fabricate a 3D part.
- Use a CNC mill to digitally fabricate a mold out of wax
- Create a negative of the mold with a flexible rubber
- Use the flexible rubber as the mold for the final part (much easier to release part from a flexible mold rather than the wax)
I was very excited about the opportunity to apply this technique to 3D map creation. Wouldn't it be cool to learn how to mill out 3D surfaces
and then cast them in more permanent materials? (In particular, I think this would be great for climbers and route planning!) My roommate suggested I
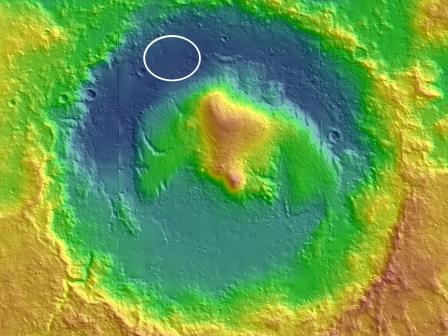
stick with a space theme, so I decided to mold and cast a crater on Mars called Gale Crater. This is the site where NASA / JPL will send the
next Mars rover later this year. Very cool stuff :).
Design and Fabrication
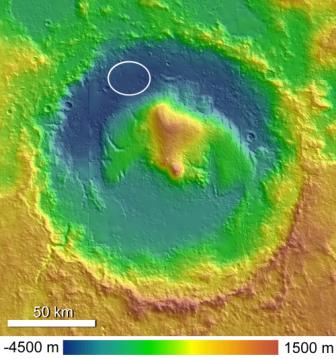
Step 1: Find an image of Gale Crater with topography. The ellipse superimposed at 11 oclock is the landing zone for the rover.
Topographic_Map_of_Gale_Crater_mod.jpg
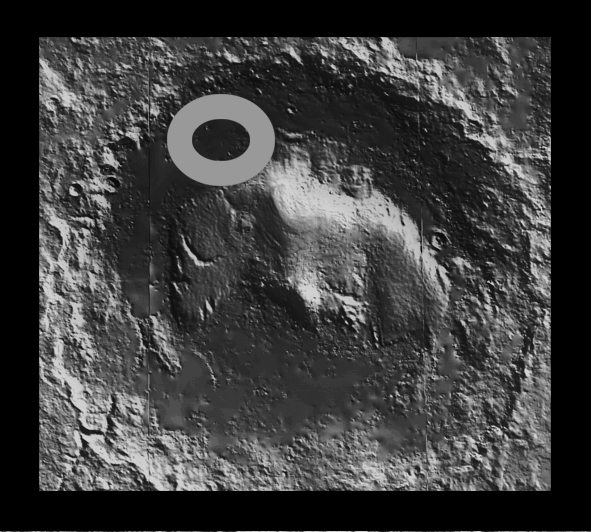
Step 2: Edit to make grayscale. Don't forget that you can't just convert to grayscale...you have to modify colors first. My personal effort
was clearly less than perfect, so we'll have to see how it turns out. The ellipse designates the landing zone.
Topographic_Map_of_Gale_Crater_mod_bw.png
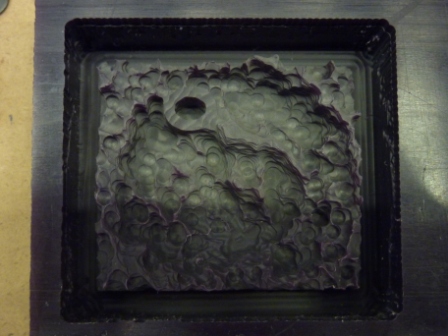
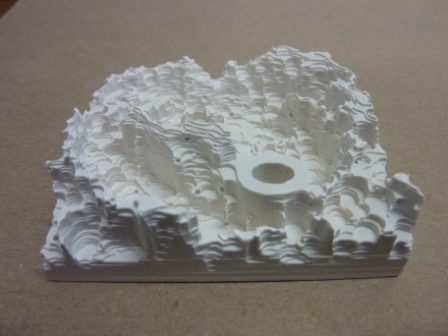
Step 3: Mill out the positive wax mold. Do one pass on 'wax rough cut.' Complex and random (not governed by simple equations)
geometry will create complicated and suboptimal toolpaths; these will take a very long time...so plan accordingly and bring something else to do while milling.
It does look pretty cool though!
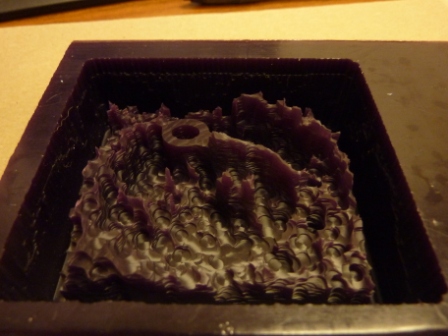
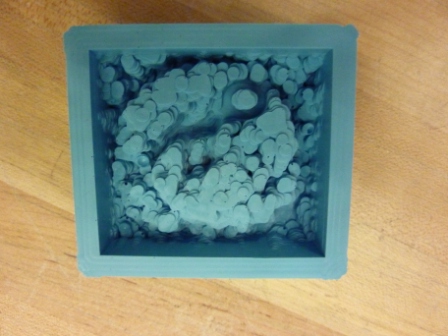
Step 4: Make the flexible negative mold. Notice there are a few bubbles...perhaps casting isn't my calling.
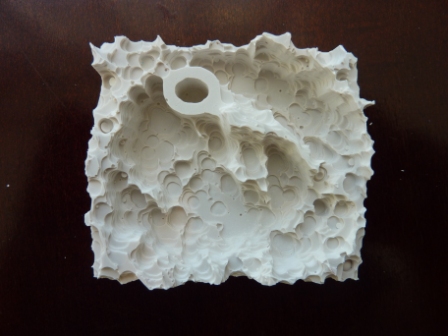
Step 5: Cast the final part in the flexible mold. I used DryStone. The result is pretty cool. I wonder how
long I will go before breaking the tiny peaks and ridges?
Tips and Lessons Learned
- Don't forget that complex geometry will generate complex tool paths. Complex tool paths can take a very long time. Don't be like me and only
sign up for 2hrs when you really need 6. Thanks to those who waited for me so patiently...:)
- It seems that bubbles form at right angles (of which my part has an abundance)...keep this in mind during design. Also, lots of 'local minimum'
(aka lots of different dips and valleys) probably lend themselves to bubbles. Be aware!
- The walls of my flexible mold (approx 0.3" thick) did bow outward when the DryStone was poured in...this gave my final piece slightly rounded
edges. If you are trying to assemble multiple pieces and tolerances are important, you might want to use a very thick flexible mold wall or consider
other options.
Back to Main Page